Midterm week

Friday, October 30, 2015 0 Comments A+ a-

Hello guys, I know I haven't updated this blog for couple of days, and I'm really sorry for that, it's a midterm week coming, even though it's still two weeks to go, but our teacher has given us alot of stuffs to do, including presentations, 3D project, and everything need to be submitted two weeks later.

Not only that, I also got some work from the outside, and make some animations group with some of my seniors from others university, so it's kinda a busy month.

For the apologize, here I cover up my project, so our teacher asked me to create a room, so I managed to create a bedroom.
It took me almost two days to complete it, including modelling and texturing, and I want to thankyou internet for some guidance for maximising the render, also some texturing part.

The render took about 3-4 hours, but it's totally worth it!
This is the results. It's not perfect yet, since my configurations isn't complete as well as my laptop can't hold too much pressure and heat (Ouch!)

So this is the maximum results I could get. Hope you guys like it, and yes this is my first time creating a architectural design so it's not perfect yet, If you have some suggestions, always welcomed to comment down below! Cya! :)

This is the final results:

3Ds Max - How to create a pillow

Friday, October 23, 2015 0 Comments A+ a-


Hello guys!! Welcome back for another tutorials for 3Ds Max, and today we're going to create a pillow with a very easy and simple steps.

So, let's get started, shall we?

1. Change our model's scale
This time we're going to use a measurements into "Generic Units". So to change it, we can go to Customize > Unit Setup > Generic Units.

2. Setting the basic setup
Once we done that, now we need to make a box and a plane. a box will be the pillow, and since we'll put some pressure on it, we need to make a plane, or you can make another object, to make sure the pillow won't drop off. Here's the setting for the pillow. You can make the plane as big as you want. :)

And make sure to give a little bit space between the box and the plane.

3. Transforming the shape
This is the final step. Now we need to turn the box into more puffy. So click both box and the plane, then go to modify panel, find "Cloth" modifier.

It's time to turn our hard box softer, so directly click on the "Object Properties", and now we need to change our pillow into cloth material, with a pressure of 50.
While our plane as a Collision Object. Then click ok.
See the picture below for clearer explanations.


Now we may feel confused, because the object didn't change anything. Well, it's because we haven't really applied it, Try to click "Simulate Local" and we could see our pillow bouncing on the plane.
Don't forget you need to click the simulate local one more time, to turn it off unless it will keep calculating.

To make the pillow more realitically, we can put another modifier, and note, we only put this modifier on the pillow only. So click on the viewport one time to unselect all the object, then click on the pillow, go to modifier panel, find and select "Mesh Smooth".

And yes, there's our pillow.
Hope you guys enjoy the tutorials, as always, requests, feedback and critics are always welcomed! See you next time!

3Ds Max - How to create an Avenger logo

Wednesday, October 21, 2015 0 Comments A+ a-


Hello everyone, welcome back to JHong blog! 
In this opportunity, we're going to create a Avenger logo.
By the end of the tutorial, our skills for using line and splines tool will be improve.
Also, we need an image to complete this tutorial, image can be download here.

The method we're going to use is a little bit the same when we're making the Apple logo at the last tutorial. If you haven't read it, you can go here.
So let's start!

1. Change our model's scale
In this tutorial, we're going to use centimeters as our scale setup. To change, go to Customize > Unit Setup > Metric > Centimeters.

2. Applying the image
As usual, to apply the image, we need something for the image to be put on. So, we're going to make a plane. Setting as the following.

Now it's time for us to apply the image to the plane, first, we need to open our Material Editor, Assign the material to the plane, and in the diffuse section, there's a small box behind it, click it and choose bitmap, then choose our image.

You probably wondering, why the image didn't show up on the plane, don't be panic, still on the material editor, click "Show shaded material". Now we need to change the plane to as big as the picture.

3. Making the body
Our setup is done, it's time to make the body. First we need to make it with line and splines.
We start by making the circle, so we go to Splines > Donut.

Once we done that, we need to get rid of the line which crossing some part of the A, which is on the bottom. So since this was splines, we need to convert it into editable splines. To do it, right click on the circle we just made, then "Convert to editable splines". After that, choose vertex.

Four dots appear, but we need more than that. So, in the vertex section, click on "Refine". By now, we can add more dots, so we need to place another four dots on the bottom edge of the circle.  See the picture below for more clearer explanations.

Now we can delete the lines between the four dots we just made, so go ahead to splines mode, then select both of the lines, press delete.

After we delete it, we'll soon realize the dot's doesn't have any edges now, so we need to connect them to their partner.
Back into vertex section, press "Attach", then select one of the dots, and connect with their bottom partner. Do the same with the other side. By the end, it would end up something like this.

The circle is done, next thing we're gonna do is to make the letter "A". Go ahead to Line section and start drawing the A. For a better line, we can hold shift while dragging the line, so it will be more accurate. And if you drag it wrong, don't be panic, we can go to one step backward by pressing "Delete". :)

By the end, our results should be like this.

Its okay for them to have each different color, it means they are different. And we need to merge them as one. How to do that? First of all, you can click on whatever object you like, it could be the circle, the A, or the little arrow, next, on the line section, click on "Attach".
Boom! Now all of them are merged together as one.

We noticed there's one small problem. Yes, the circle are crossing the A. So we need to combine them. But they already merged together. How?
It's okay, we got Boolean.
So click on the object we just merged, go to segment section, now we'll see lots of dots, so click on the circle, then press Boolean, but note, it should be on Unite boolean mode. 
I forgot the name XD 
But we can see the image below for a clearer explanation.
After you press boolean, click on the "A". Now they're unite together.

4. Shaping the body
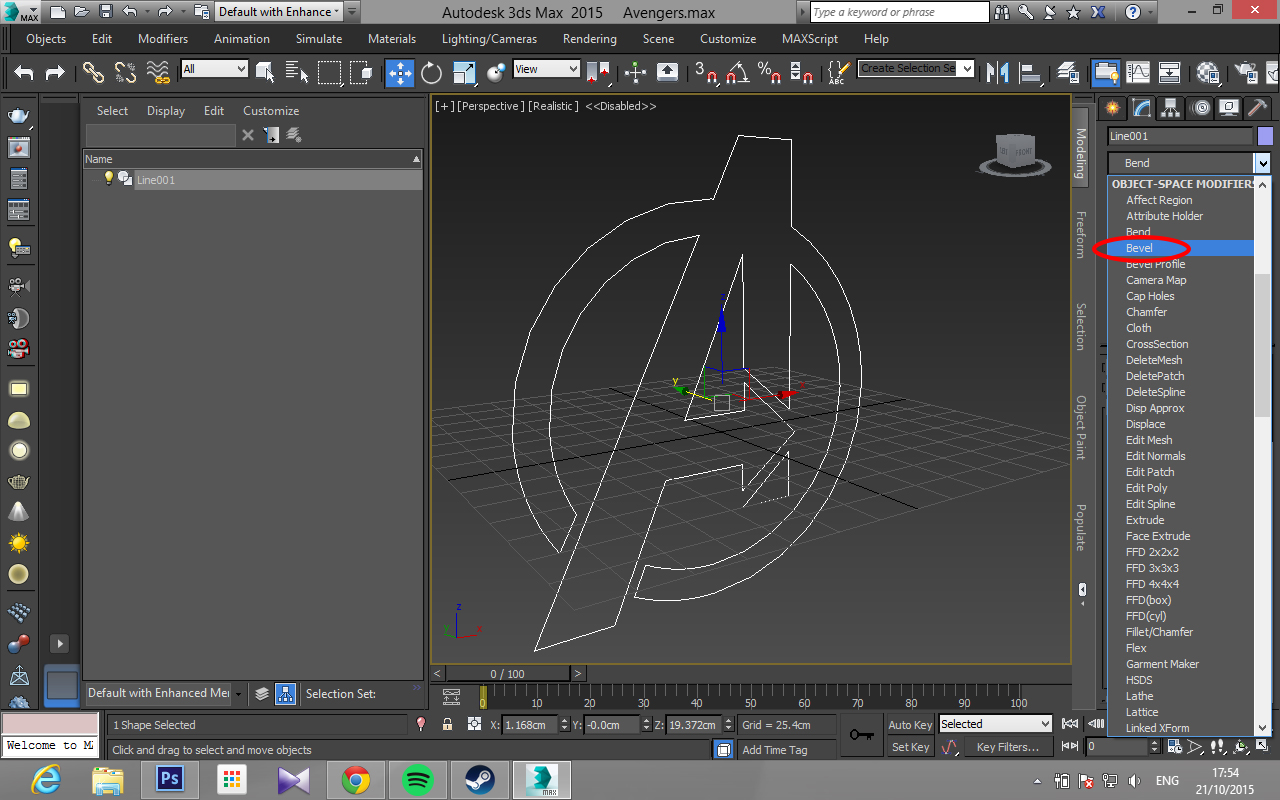
We finished with the raw shape, it's time to make them 3D, we're going to use bevel to give a better and smoother edges than extrude.
So first, we can delete our plane, then click on our Logo, on the modifier panel, click "Bevel".

Now put the bevel setting as the picture shown.
Don't forget to change the interpolation to 32 for a smoother edges!

To make our logo even more cooler, we put a text to it. In order to do that, first go to Splines > Text.

Then type "THE". The font I was using was Arial Bold with Italic, 28 cm size.
Next thing we're going to do is to pull the letter alittle closer to the edges of our logo, then on modifier panel, click extrude.

5. Grouping
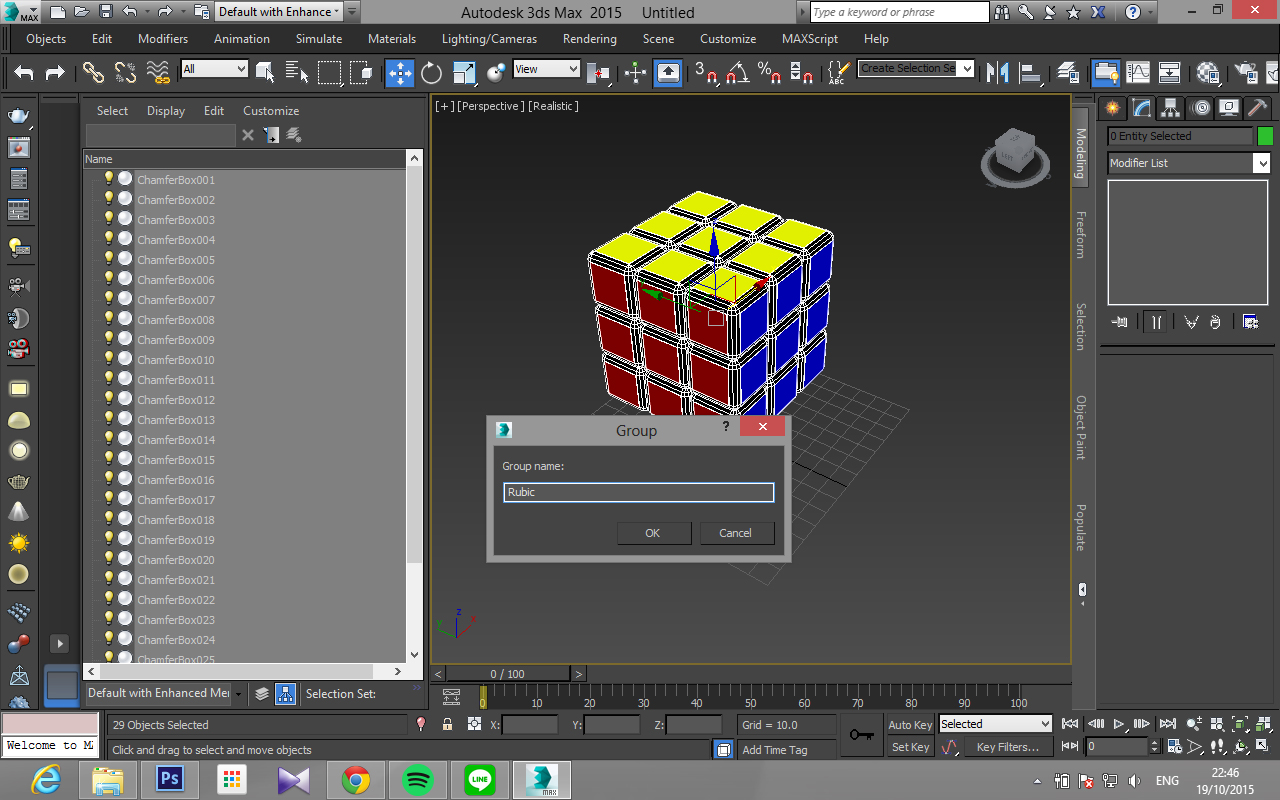
Don't forget to group them, so it will be easier when you're going to arrange them later on.
So go to Edit > Group > Group name.

Okay, so that's all for our tutorial, I hope you guys enjoy it, don't forget to suscribe to this blog, share it, and if you have any question or comment, you guys always welcomed to post it!
See you around! :D

Illustrator - How to create a Music concert poster

Tuesday, October 20, 2015 1 Comments A+ a-


Hello guys, so I was learning adobe illustrator this few weeks, and I thought this could be a great idea to share it to all of us. So, this time, we're going to make a Music Rock concert poster, and as usual we'll try it step by step. 
Hope this tutorial will help all of us, and let's get started. :)

1. Setup our page
First of all, we need to make our page, so to do that, go to File > New. A page setting will pop up, then change the size into A4 and CMYK for the color mode.

2. Making the stars
Now we have the basic setup, first we need to color up our background, so go to the "Rectangle Tool" and drag it from top corner, until the bottom corner. 

Once we done that, it's time to put the pink background, and to make it unique, we're going to make it a little bit abstract, so this time we're going to make a pink star and later on we'll make the star as the background.
To make a star, go to the "Rectangle Tool", left click hold and more option will appear out, then choose star. Follow this setup for the star, don't forget to change the color into pink.

Now we have the star, it's time to duplicate it to 140 pieces. Don't be shock, we'll find the easiest way to do it. So check it out! :)
First we make the first line, so in the left panel, theres a "Black Arrow" icon, double click, and follow this setting.

By now we have two star, with the shortcut "Ctrl + D" we can quickly duplicate the star until it reaches 10. Then, we can arrange a little bit these stars to make it tidier.

Now we need to duplicate these 10 stars to the bottom, same method, double click the black arrow, then change the vertical to 20, and press copy.

Same as the last step, with shortcut "Ctrl +D" duplicate those 10 stars until we have 14 lines of 10 stars. By the end, we'll have something like this. To make it beautiful, I have changed several of the color into dark red.

3. Making the background
Now we have stars, it's time to combine them into one. This part is alittle bit tricky, so I'll try to explain it more carefully and slowly.
First, lock your background, so it will be alot easier to select the stars.
Select all the stars by dragging your mouse all around them, NOT by clicking the little circle beside the layer. Why? Trust me, the results will be different, so it's a little bit tricky where most people do it wrong.
After you select all of them, turn the opacity into 50%.

Let's transform them together, so go to Object > Transform > Transform Each.
A panel with go out, then put this amount of setting. Don't shock of the results, we'll fix it later. :)

Once we have it, group them together by selecting all the stars, then press group.
Next, what we should do is to copy our Black Background, then drag it to the top. After that, resize it until It looks something like this. 
Note: To drag it easier and nice, at the top corner of the rectangle, hold Shift + Alt, so it will resize all four corner.

Our mission is to fit all those stars into our new black rectangle, so to do that, select the new rectangle and your stars. (To make it easy, lock your bottom background) then right click > Make Clipping Mask.
By the end, we'll have a results like this.

4. Finishing touch
We have the background, it's time to do the final move to finish this poster.
So let's make a Big black star on the center and type the word as the picture below.

To make it more epic and better, we'll make an outline for the word "Rock 'n Roll". But before that, this font is Arial Bold.
In case you guys can't find out the " ' " symbol, I wrote it on the notepad first, then I copy to the illustrator.

So to make the outline, first we need to change the text into picture. How to do it? Go to Object > Expand.
Now the software recognize the text as the picture. What we need to do now is to make the outline, so first go to Type > Create Outlines.

After that we need to make the thickness, so go to Object > Path > Offset Path
And set the path to 4 mm.

Now there we have it, a music concert poster!

Hope you guys like it, and as always you can comment down below for any request or comment. :)
Sorry for the rush at the end of the tutorial, I was late for class xD
Cya!


3Ds Max - How to create a rubic

Monday, October 19, 2015 0 Comments A+ a-


Hello guys, it's been a long time since the last time I posted a tutorial. I'm sorry for that, I got alot of homework last week, and I started to learn After Effect too! 

So, straight to the point, what we're going to learn today is to create a rubic.
let's start!

1. Change your model's scale
Okay, in this tutorial, we're going to use Generic Units as our scale, so let's head up to Customize > Unit Setup > Generic Units.

2. Creating the body
This probably the first tutorial in this blog which we won't be using any splines or lines, we'll create the rubics directly with the shape, and if you think we're going to use a box, you're wrong. we'll be using a chamferbox. :)

We won't directly find Chamferbox, so we need to change the Standard Primitives into "Extended Primitives" and apply the setting like the picture below.

Once we put the setting, it's time to make a little bit extrution. So what we're going to do next, is to right click on the chamferbox, then select "convert to editable poly" and select the "Polygon" icon.
Then, it's time for us to select all six faces by clicking one face, then when we're about to select the second face, don't forget to hold ctrl. 

After we selected all six faces, scroll down and click a small box beside extrude button, it will gives us more optional setting to it, and extrude it for 0.2. So by now we'll have more realistic shape of a rubic.

3. Applying the color material
Now we have the basic setup, you probably confuse why we stop for one chamferbox and not making the rest of the boxes, well, we'll get the answer later on.

Take note, in this tutorial I'm going to use a Vray, it's okay if you don't have it, you can use mental ray too. The step is the same, so go to the "Render Setup" then, on the "common" section, scroll down until you find "Assign Renderer", then let's change our renderer into Vray / Mentalray.

Once we done that, the next step is to open our material editor. Now, if you're using Vray, in standard button, change it into "Vraymtl" while Mentalray, change it into "Arc&Design", then we can start picking colors.

It's up to you wether you want to follow my colour or make your own, my color is Red, Yellow, Blue, Green, White, Black, and Pink/Magenta.

Ok, before assigning the material, we need to select all our six faces, inside the polygon section, click Grow one time. The reasons of doing this is because we have extruded these polygons slightly before, so now we need to have an extra polygons.

Once we done that, it's time to put the colour. There's two way of doing this, but the easiest one is by dragging the colour into the face you want the color to be put on.
First, drag the Black color first, we'll notice the black will cover up all the faces, but don't worry.

To put each of the colour, you need to click the face you want first, then drag, so the colour will only applied on the selected face.
By the end we'll have results like this.

4. Duplicate the ChamferBox
As the title said, it's time to duplicate the box. Luckily 3Ds Max comes out with a great features which we can directly copy them quickly instead of copying one by one, and it's called Array.
How to open the Array panel? First we go to Edit > Duplicate > Array.

Array menu should be appearing by now, it's time to adjust it, follow the picture below.

After you put the setting, don't forget to preview first, so we'll know wether we're doing it right or not. Click again the preview button to close the preview.
Don't close the panel yet, continue with this setting.

Still on the same array panel, follow this setting to make the rest of the boxes.

5. Grouping
Now we have the rubic, but each boxes still counted as one item, so we need to group them together, to group it, first we need select all the chamferboxes then go to Edit > Group > Group.

There we go! Our rubic is done, thankyou for the support, and as always if you have any requests you can always comment down below. Cya! :D