
3Ds Max - How to create a rubic

Hello guys, it's been a long time since the last time I posted a tutorial. I'm sorry for that, I got alot of homework last week, and I started to learn After Effect too!
So, straight to the point, what we're going to learn today is to create a rubic.
let's start!
1. Change your model's scale
Okay, in this tutorial, we're going to use Generic Units as our scale, so let's head up to Customize > Unit Setup > Generic Units.

2. Creating the body
This probably the first tutorial in this blog which we won't be using any splines or lines, we'll create the rubics directly with the shape, and if you think we're going to use a box, you're wrong. we'll be using a chamferbox. :)
We won't directly find Chamferbox, so we need to change the Standard Primitives into "Extended Primitives" and apply the setting like the picture below.

Once we put the setting, it's time to make a little bit extrution. So what we're going to do next, is to right click on the chamferbox, then select "convert to editable poly" and select the "Polygon" icon.
Then, it's time for us to select all six faces by clicking one face, then when we're about to select the second face, don't forget to hold ctrl.
After we selected all six faces, scroll down and click a small box beside extrude button, it will gives us more optional setting to it, and extrude it for 0.2. So by now we'll have more realistic shape of a rubic.

3. Applying the color material
Now we have the basic setup, you probably confuse why we stop for one chamferbox and not making the rest of the boxes, well, we'll get the answer later on.
Take note, in this tutorial I'm going to use a Vray, it's okay if you don't have it, you can use mental ray too. The step is the same, so go to the "Render Setup" then, on the "common" section, scroll down until you find "Assign Renderer", then let's change our renderer into Vray / Mentalray.

Once we done that, the next step is to open our material editor. Now, if you're using Vray, in standard button, change it into "Vraymtl" while Mentalray, change it into "Arc&Design", then we can start picking colors.
It's up to you wether you want to follow my colour or make your own, my color is Red, Yellow, Blue, Green, White, Black, and Pink/Magenta.

Ok, before assigning the material, we need to select all our six faces, inside the polygon section, click Grow one time. The reasons of doing this is because we have extruded these polygons slightly before, so now we need to have an extra polygons.

Once we done that, it's time to put the colour. There's two way of doing this, but the easiest one is by dragging the colour into the face you want the color to be put on.
First, drag the Black color first, we'll notice the black will cover up all the faces, but don't worry.
To put each of the colour, you need to click the face you want first, then drag, so the colour will only applied on the selected face.
By the end we'll have results like this.

4. Duplicate the ChamferBox
As the title said, it's time to duplicate the box. Luckily 3Ds Max comes out with a great features which we can directly copy them quickly instead of copying one by one, and it's called Array.
How to open the Array panel? First we go to Edit > Duplicate > Array.
Array menu should be appearing by now, it's time to adjust it, follow the picture below.

After you put the setting, don't forget to preview first, so we'll know wether we're doing it right or not. Click again the preview button to close the preview.
Don't close the panel yet, continue with this setting.

Still on the same array panel, follow this setting to make the rest of the boxes.

5. Grouping
Now we have the rubic, but each boxes still counted as one item, so we need to group them together, to group it, first we need select all the chamferboxes then go to Edit > Group > Group.
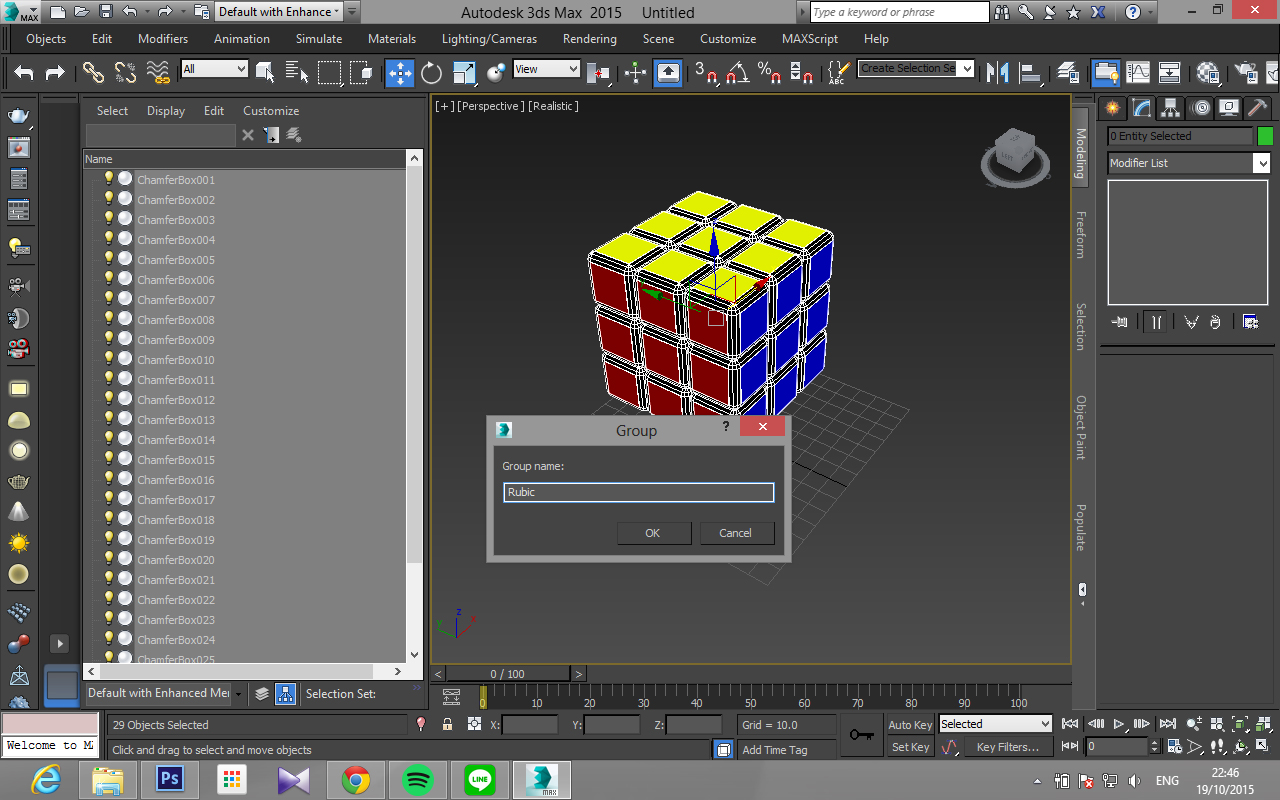
There we go! Our rubic is done, thankyou for the support, and as always if you have any requests you can always comment down below. Cya! :D


